Building the Thunderhawk, Part III
This is the first non-paper model that I've built in more than a decade, and it has been fun to experience some things that I hadn't felt in a long time. I remember from building model airplanes that when the construction (as opposed to finishing) is complete, you've got the shape you're shooting for, in dull gray or green or whatever color the parts were extruded in. It looks pretty good. You can see the form of what it's going to be, just in monochrome. Then the first color of paint goes on, and it's another shade of monochrome. It looks pretty underwhelming to your physical eye, but if you're the modeler you may not care because hopefully you're seeing it in your mind's eye. To everyone else in the world, it looks like a boring lump, and they may tell you so later. "Oh, that looks so cool now. It looked pretty blah when you had the first coat of paint on." Yeah, duh.
But something I'd forgotten about is that two colors of paint don't necessarily look any better, and even after you have all of the painting done, the model still looks very plain and boring. No matter how cool the shape is, it looks very crude. It doesn't look real. Then you put the decals on, and suddenly BOOM it looks awesome, like a real object and not just someone's pathetic downscaled version.
No such awesome pictures here. These are all from the painting stages. I actually did put on the decals last night and this morning, and it looks pretty sweet (sez me). But I don't have any good outside daylight photos of the finished product, and I'm flying it tomorrow morning anyway, so I'll have lots to post very soon. I am very pleased with how it turned out. There are things I could have done better. I should have done the seal-sand-repeat thing on the fins, I should have filled the body tube spirals, and I got a little out of hand making fillets with spackle. But mainly I like how mean it looks. It has very aggressive lines. When it's sitting on the table, it looks like it wants to tear off and blast some bad guys.
Okay, enough self-love by proxy. Here are the pics.

Some things that I tried on this model are tips that I found online, like using spackling compound to make fillets. That one worked great, I just overapplied it. Another suggestion was to use clear Scotch tape to mask off areas to be painted. Bad idea. I had the canopy all ready to go two weeks ago, then I pulled off the tape and it pulled up all the layers of paint underneath it, down to the surface of the Dremeled breath mint container. I've never had trouble with paint sticking to super glue, so I CA'd the canopy and then gave it two coats of red. Here it is masked off with masking tape (clue's right there in the name) and painted gray.

A closeup of the masking tape on the canopy.
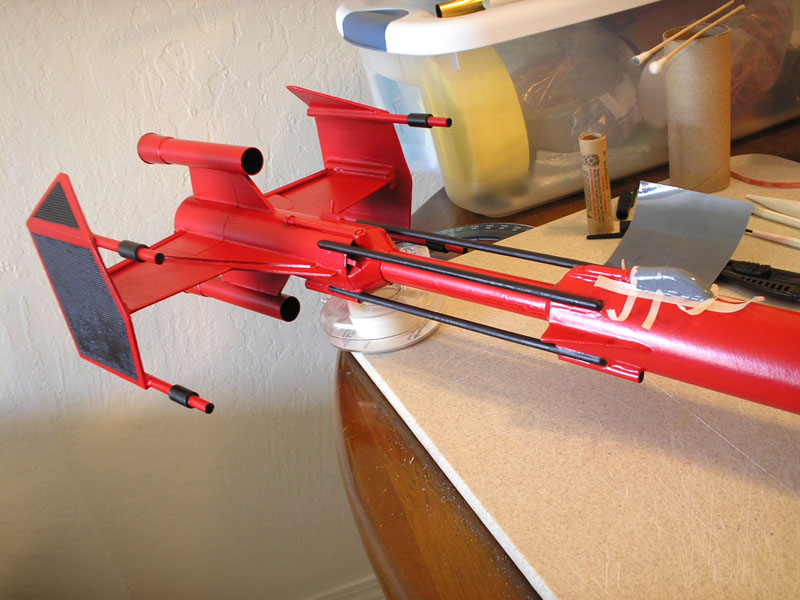
Here's the interesting end of the rocket. Grrrr, baby, verrry GRRRR!!

From the front. The long forward fuselage actually adds a lot to the gestalt coolness of the rocket. I had thought about making the front end shorter, and I'm glad now that I didn't. It also doesn't hurt from a stability standpoint.

From the back, with the masking tape off.
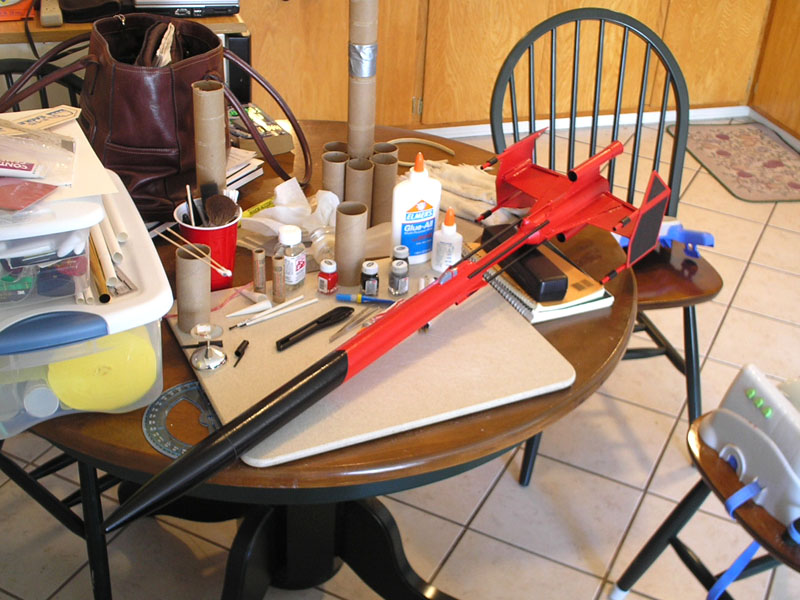
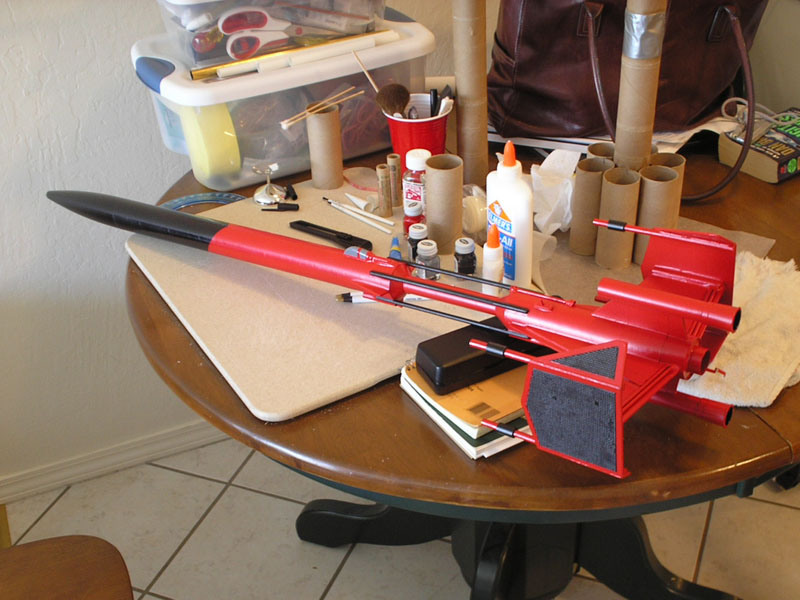
The whole enchilada. Sorry the background is so cluttered. Incidentally, you're looking at my whole workspace: a big cutting board for a work area and a couple of plastic tubs full of tools, glue, paint, and parts. Oh, and the ghastly thing behing the Thunderhawk is the Turd Burd, a tube-fin design made from paper towel and toilet paper tubes. Yeah, I know paper towel tubes aren't strong enough. I reinforced them internally. It looks like crap, intentionally, but it should fly just fine.
Next up: decals.
posted by Matt Wedel at 11:04 PM
![]()

0 Comments:
Post a Comment
<< Home