Sunday, August 27, 2006

Turd Burd

A damn goofy rocket, but one of my favorites. I've had it in mind since about Christmas, and in the end I almost decided not to build it. I'm glad I did. It flies great, and it was a real crowd-pleaser at the launch. One of my favorite moments at the launch came when I was taking the plastic plate saucer to the pad right after flying the Turd Burd. I overheard someone say, "This guy will fly anything!"

Hell yeah.

Rather than blather on about this one, I'm going to post a link to the article I wrote for EMRR. Many thanks to Nick for posting it, and for having such a kickass site in the first place.

Saturday, August 26, 2006

Snowbird Zero

I wrote in a previous post about the joys of paper rockets. Snowbird Zero was my second foray into this cheap but challenging field.

I didn't intend to go big into paper rockets, but just as Currell Graphics got me started, Jimmy Yawn inspired me to go farther. Jimmy's series of pages on his homegrown Snapdragon are a well written, fully illustrated how-to guide to rolling your own rockets. He has detailed instructions on how to roll nosecones and body tubes out of paper or cardstock. I was planning on making tubes for 18mm (A through C) or 24mm (D and E) motored rockets. Then I went to Wal-Mart and found four-packs of A10-3Ts for $4.97. At that price, I couldn't not buy a pack, but I didn't have any mini-motored birds in which to use them. I couldn't find any that I liked in the local stores, and I didn't have time before the launch to order any online. Time to roll my own!

The key to body tubes is having a nonstick former to roll them around, something that white or wood glue won't stick to. I found a 9/16" brass cylinder for a couple of bucks and started rolling body tubes. The key to rolling body tubes is to remember that they cost nothing in time or money, so you might as well roll a bunch and chose the handful of perfect ones to use in your rockets. It took me a couple of sessions to get very good at it, and even then every third tube came out crooked, wrinkled, or otherwise ugly.

I also tried rolling nose cones, but I had less success. I decided to bite the bullet and buy a pack of PNC-5 nose cones for 13mm body tubes. A pack of five nose cones was five bucks. So if could make everything else myself, the cost of each of my mini-motored birds would be one dollar--a few cents less than the motors that would push them. I had body tubes down and nose cones in hand, so now all I needed were fins.

I'm lazy and I hate sanding, sealing, and aligning fins. You don't have to sand or seal paper fins, but alignment is still a potential pitfall. Then I found Art Applewhite's 13mm Six, a six-sided paper rocket. The fin can for the Six is a one-piece unit that is cut and folded into shape. If you do it right, you get three fins spaced evenly around the rocket and perfectly aligned. The method works for any number of fins, but if you use the one-piece fin can the number of fins and their leading edge sweep are inextricably linked. Each fin is folded double along its leading edge, so the leading edge angle (from the body tube) multiplied by the number of fins must equal 180. A three-fin can will have fins swept back at 30 degrees. Four fins must be swept at 45 degrees, six fins would be steeply raked at 60 degrees, and so on. If this doesn't make any sense, compare the plans shown below with the photos of the finished rocket.


Pretty much everything about this rocket was dictated by the fact that it was intended to fly on A10-3T motors. A short, light bird will simply disappear on those motors. I at least wanted to get the nose cone back. The pack of nose cones included a couple of short blunt ones and three long ogive types. The shorties would be great for making a downscale clone of the Big Bertha, and the long ones would make a killer 13mm Der Red Max, but I didn't trust rockets that short not to go stratospheric on the A10s. I decided to make a sort of "sport scale" clone of the Estes Bluebird Zero, a nice long-bodied model from the days before Estes fell in love with boring, plastic-finned 4FNCs. I don't have a color printer and I was too lazy to go to Kinkos to print out the parts in color, so I decided that my rocket would be black and white. Hence the plans with "Blackbird Zero" printed on them. But the all-black body wrap didn't turn out so well, so I left it off, and in the end I named the rocket Snowbird Zero.

The very long body tube is made from two hand-rolled tubes and a more tightly-rolled coupler. I used the forward fin can to cover up the join. If the front of the body tube looks bent, it's because I used a through-the-wall shock cord mount and covered it with a long body wrap (the body wrap was another idea borrowed from the indefatigueable Jimmy Yawn). The motor block and launch lug are also made of rolled paper.

A note on the body tube diameter. Estes mini-motors are 13mm in diameter. The brass tubes at the hobby store came in sixteenth-inch increments. Half an inch is 12.5mm, just too small to admit a motor, so I went for the next size up. But 9/16" is just a smidge too big. The motors and the nose cone were sliding all over the place. I made single-turn internal wraps out of sketch paper to decrease the internal diameter of the body tube at either end.

The flight was fast, straight, and not so high that the rocket disappeared. It probably helped that I packed the nose cone with handy-tack beforehand. The streamer deployed just as planned at apogee, and the rocket came down just fine. But on recovery I saw that the ejection charge had blown out something inside the rocket, because the front of the body tube was occluded by a wad of scorched paper. It's either the thrust ring or the internal wrap for the nose cone. I haven't investigated enough to figure out which. I know that's lame. I really need to get it fixed. For one thing, I need to know what went wrong so I can make the next rocket better. And I still have three A10s left to burn and nothing else to fly them in.

Anyway, I try to learn something from every rocket, and this one was a good introduction to a lot of techniques that I hadn't tried before. I will definitely build more like this.

Awesome rocket names


Lately I have enjoyed reading about the exploits of Rocket Team Vatsaas. Good luck going there; in my experience over the past few weeks, the link is down about 3/4 of the time. But it's worth trying. They have built some crazy low and high power rockets.

Their high power rockets are even wackier than their low power jobs, which is a pleasant change from the usual. High power rocketry usually doesn't interest me much. I like to fly at the park with rockets that cost less than a hardback book, that I can build at the kitchen table, that I can watch all the way up and all the way down, and that for the most part won't kill me to lose if they should happen to CATO or blow away. Mostly high power rockets bore me. I don't dig on 3FNCs. I understand why most high power rockets are that shape--if you're going to sink somewhere between 100 and 1000 dollars into a rocket, you want it to perform. But I'll stick with my under-a-pound oddrocs, thanks.

Anyway, I didn't start this post to expound on my love of low power rocketry. Rocket Team Vatsaas comes up with names that are just as baroque as their birds. Here are a few of my favorites, presented in no particular order, sans commentary, for promotional purposes only.

Commander Kip Quasar's Galactic Zephyr

The Evil Doctor Manchu's Avenging Projectile of Doom

The Happy Birthday Party Napkin Rocket of the Apocalypse (pictured lifting off above; pic borrowed from the Team Vatsaas site)

Grandma Lucy's Semi-Annual Memorial Day Prickly-Heat Telethon-of-Love

Kidd Plasma's Flaming Atomic Meteor of Justice

Peppermint Stick Suppository of Righteous Indigestion

Queen Sciatica's Pestilent Pirate Armada, Vessel Number 1

Humbled by this awesome display of nomenclatural legerdemain, I decided to christen the rocket I'm currently building the Evil Toothfairy's Flying La-BOR-a-tree of Dental Torment. More on that soon.

Thanks for the inspiration, guys.

UPDATE: Dur. Of course Rocket Team Vatsaas has a whole page dedicated to unusual rocket names. Also, roadside rockets, rockets on cakes, oddrocs, notrocs, and a host of other weirdness at their Missile-aneous page.

Currell Graphics V2


I have a hard time building one rocket as a time. Inevitably, as the glue is drying on some delicate construction, I get antsy and want to put something else together. When I started building the Thunderhawk, I thought it would be done in a week and I'd be on to other things. I ended up spending a month on it and building several other rockets in the meantime.


The first two were paper rockets. I was introduced to paper models a couple of years ago when I stumbled across Ralph Currell's site. When I was a kid, I built a lot of model airplanes. Building models has always appealed to me, but I enjoy the construction a lot more than the finishing. I didn't want to built a kitted plastic model airplane. It's too cookbook, and I don't see much point in doing that as an adult unless I am going to produce a competition-quality finish, which I'm not interested in and am probably incapable of anyway. Model rockets appeal to me because they do something. Paper models appeal to me because they are more satisfying to build than plastic models. You start with a few sheets of cardstock, make the components, and assemble them into something that looks awesome. Model rockets built out of paper are appealing for all kinds of reasons. One of the major attractions is building a model rocket that doesn't cost anything. V2 kits are not common, and pricey enough that I wouldn't want to screw up the build (which is why my Estes Canadian Arrow is still in its bag). But a paper V2 kit can be downloaded, printed, cut, and finished in two days, for free and without risk. As paper modeling advocates are fond of pointing out, if you screw up the build, just print out some more parts and start over.


I built Ralph's R101 airship a couple of years ago and really enjoyed both the process and the result, so I decided to give his V2 a whack. It was an easier build than the airship, mainly because the body sections are perfectly round instead of ribbed. Also, I cheated on the fins. Instead of building up an internal framework of ribs as the instructions call for, I just laminated several layers of cardstock to thicken and strengthen the fins. As designed by Ralph, it is a static display model, but lots of people have modified it to fly on standard model rocket motors. I used a free paper flying model rocket, the Fliskits Midnight Express, for the "guts" of the V2. I flew the V2 last weekend, and it performed flawlessly. I'll fly it till it dies, then build another.


Irritatingly, I didn't get any photos of the V2 on the pad or in the air. Oh well, I guess I'll just have to go fly it again. Bummer!

Oh, I mentioned in the second paragraph that I built two paper models. The other one will be the subject of an upcoming post.

Saturday, August 19, 2006

Art Applewhite's Gift To Mankind


I had an attack of rocket fever early this spring. It lasted long enough for me to blow all my Christmas money on rockets, but not long enough for the rainy season to end, or for me to get any of them built. That turned out to be just fine, because when I got the announcement about this launch, I had plenty of parts and gear on hand.

The other thing I accomplished (?) in my post-Christmas rocket mania was to find a zillion cool rocketry sites on the web. One that stuck in my mind was Art Applewhite's page on making flying saucers from Hefty Serve'n'Store plastic plates. I definitely wanted to make one, but finding the plates was not easy. Most stores around here just don't carry them. I finally tracked them down at the Wal-Mart (hiss!) on Hegenberger in Oakland--the same place that has all 13mm and 18mm motors for $4.97 a pack.

They had small and large plates, and I picked up the big ones just because, hey, bigger rocket. Then I did some checking on Art's page and found that he was flying these things on much larger engines than I wanted to mess with. So I cut the holes in the top and bottom to hopefully decrease the drag. I have no idea if cutting the holes was effective, but the rocket flew and flew well. I also cut four flaps into the edges of the holes on the bottom of the saucer, and bent them down to lend the thing some rotation.


The saucer had three great flights on D12-3s. The flights were all pretty similar. This rocket has the slowest, noisiest, smokiest liftoffs I've ever seen. I'm a big fan of all three of those things, so I was happy, and it was a definite crowd pleaser. It also made it easy to take good launch photos. In all three cases, she zoomed up to about 100 or 150 feet, spinning, roaring, and smoking all the way.


The only potential problem is that this rocket fell out of the sky fast. She had a tendency to turn on her edge and come in fast and hot like a frisbee. Even with the delay of only three seconds, the ejection charges all blew when she was within 20 feet of the ground, and on the last flight, shown here, she actually landed and then popped. So this is definitely a "heads up" rocket on D engines. But that's not much of a problem, since every head in a wide radius will be turned skyward when one of these babies takes off.

Oh, the package of a dozen Serve'n'Store plates cost less than two dollars, which puts the total cost of the rocket at just under 17 cents. I started construction, such as it is, at 24 minutes after the hour and I was done by hour's end. Best $0.17 cents and 36 minutes I ever invested in a rocket.

Still more launch stuff to come, but I think that's all for this evening.

The Thunderhawk Flies!


Today was my first rocket launch in at least 10 years, and probably longer. When I was a kid, I never even tried to get a photo of a rocket at the moment of liftoff. Using the digital camera today, I actually got to be pretty good at it. But tragically I have zero pictures of the 'Hawk in the air. I cut it a little too fine here. You can see a teensy puff of gray smoke right at the bottom of the rocket (you may have to zoom the crap out of the image, but believe me, it's there). A tenth of a second later she was sitting on a pillar of smoke and fire as long as she is, and another tenth of a second after that she was well out of the frame. So I'm not going to be too hard on myself. Still, I wonder now why it didn't occur to me to point the camera skyward and get a picture of the boost. Something to remember for next time.

Thanks to Alan (left) for launching the rocket while I snapped the pic.


I had Joel take a few photos before the first flight. Just in case, you know?


Fierce, baby!


My fears were unfounded, though. Thursday night I used the Rocket Simulator at EMRR to predict the flight characteristics. The sim predicted a max altitude of 250 feet on a D12, and a three-second coast to apogee after the end of thrust. So I got some D12-3s, and sure enough, the Thunderhawk ROARED off the pad, flew up to about 250 feet, and popped her chute right at the top. There was a light breeze on the first flight, maybe 5 mph, and a bit stiffer breeze on the second. She weathercocked a little, basically just enough so that she landed near the pad after floating down on the chute. On the first flight I could have caught her in the air, but I chickened out at the last minute. That's a lot of rocket coming out of the sky at you! The weeds she landed in were probably more gentle than I would have been anyway.

In the above photo she's set up for a third flight, but it never happened. I tried launching twice, but she didn't fire either time. Mysterious launch system nonfunction plagued us throughout the day, and progressively as the day drew on. I swapped out the motor and igniter (I'm sure it wasn't a motor problem, but why take chances?), but by that time the wind had picked up too much. I used that motor and igniter in my flying saucer, and they worked great. More on that in the next post.


For now, the saga of the Thunderhawk ends on this brave note: looking to the sky, and to the future.

Building the Thunderhawk, Part IV

The final stages: decals and glosscote. The local hobby store has a huge selection of decals for sale. Most of the sheets are between three and five dollars, so you get some sweet decals without blowing a lot of dough. And they really add some visual punch. I flipped through a couple of fat folders of model airplane decals and found two sets that I liked, both from American military planes. Decaling took a while, but it was worth it.


Here she is all dressed up.


The back end.


The cockpit. I bought one of the sheets just for the "Death on Wings" banner. The number 13 may be tempting fate, but fate hasn't bitten back yet.


Here she is out at the range, with the rest of my little fleet. Details on makes and models to follow, or you can get the short version here.


That's it for the build. Between the first drop of glue and the last wisp of glosscote, a month elapsed, but I wasn't working on it all the time and sometimes days would go by with no action (sorta like my dissertation). It also ate up two tubes of super glue, one big bottle of Elmer's, and four cans of spray paint.

Mainly, it's a huge relief to have it done, and an even bigger relief to have logged a couple of successful flights. But that's a story for another post.

Launch!


Just got back from a beautiful, satisfying, successful launch at Cesar Chavez Park. All of my birds performed flawlessly. There's at least one full post to come on this, but in the meantime check out photos from the launch at my Flickr site.

Friday, August 18, 2006

Building the Thunderhawk, Part III


This is the first non-paper model that I've built in more than a decade, and it has been fun to experience some things that I hadn't felt in a long time. I remember from building model airplanes that when the construction (as opposed to finishing) is complete, you've got the shape you're shooting for, in dull gray or green or whatever color the parts were extruded in. It looks pretty good. You can see the form of what it's going to be, just in monochrome. Then the first color of paint goes on, and it's another shade of monochrome. It looks pretty underwhelming to your physical eye, but if you're the modeler you may not care because hopefully you're seeing it in your mind's eye. To everyone else in the world, it looks like a boring lump, and they may tell you so later. "Oh, that looks so cool now. It looked pretty blah when you had the first coat of paint on." Yeah, duh.

But something I'd forgotten about is that two colors of paint don't necessarily look any better, and even after you have all of the painting done, the model still looks very plain and boring. No matter how cool the shape is, it looks very crude. It doesn't look real. Then you put the decals on, and suddenly BOOM it looks awesome, like a real object and not just someone's pathetic downscaled version.

No such awesome pictures here. These are all from the painting stages. I actually did put on the decals last night and this morning, and it looks pretty sweet (sez me). But I don't have any good outside daylight photos of the finished product, and I'm flying it tomorrow morning anyway, so I'll have lots to post very soon. I am very pleased with how it turned out. There are things I could have done better. I should have done the seal-sand-repeat thing on the fins, I should have filled the body tube spirals, and I got a little out of hand making fillets with spackle. But mainly I like how mean it looks. It has very aggressive lines. When it's sitting on the table, it looks like it wants to tear off and blast some bad guys.

Okay, enough self-love by proxy. Here are the pics.


Some things that I tried on this model are tips that I found online, like using spackling compound to make fillets. That one worked great, I just overapplied it. Another suggestion was to use clear Scotch tape to mask off areas to be painted. Bad idea. I had the canopy all ready to go two weeks ago, then I pulled off the tape and it pulled up all the layers of paint underneath it, down to the surface of the Dremeled breath mint container. I've never had trouble with paint sticking to super glue, so I CA'd the canopy and then gave it two coats of red. Here it is masked off with masking tape (clue's right there in the name) and painted gray.


A closeup of the masking tape on the canopy.


Here's the interesting end of the rocket. Grrrr, baby, verrry GRRRR!!


From the front. The long forward fuselage actually adds a lot to the gestalt coolness of the rocket. I had thought about making the front end shorter, and I'm glad now that I didn't. It also doesn't hurt from a stability standpoint.


From the back, with the masking tape off.


The whole enchilada. Sorry the background is so cluttered. Incidentally, you're looking at my whole workspace: a big cutting board for a work area and a couple of plastic tubs full of tools, glue, paint, and parts. Oh, and the ghastly thing behing the Thunderhawk is the Turd Burd, a tube-fin design made from paper towel and toilet paper tubes. Yeah, I know paper towel tubes aren't strong enough. I reinforced them internally. It looks like crap, intentionally, but it should fly just fine.

Next up: decals.

Building the Thunderhawk, Part II

More rocket construction pics.


This picture follows on pretty closely from the last one in the first set. Here both wings are attached, but no cockpit, muzzle brakes, or screamers. The rocket is still laying on its side.


Here we're getting close to the end of construction. Just in front (to the right) of the fuselage transitions you can see the cockpit canopy in blue. I Dremeled it out of a breath mint container; the other half of the container is laying in front of the rocket. The red screamers (noisemakers) are glued into the dorsal and ventral pods, and I added cardstock panels to strengthen the fins.


Here's the ass end of the rocket in dorsal view. I wrapped masking tape around the gun barrels to make muzzle brakes. The detail bits at the front of the aft fuselage are made from spare model airplane parts (green), more of that breath mint container (blue), and a pen cap (black), plus a piece of small dowel rod.


Time to detail the solar panels. This is fiberglass screen, cut with scissors over a traced wing pattern with a half-centimeter inset on all sides. Good shot of the cockpit canopy here too.

At first I painted the whole rocket gray, thinking I'd go for black-on-gray coloring like a TIE Interceptor. But it looked too dull, so I repainted the whole thing red. The nose, solar panels, gun muzzle brakes, and fuselage braces are black, and you can see that the fuselage braces are still masked off. Still a fair amount of work to do. I need to paint the cockpit canopy, touch up the paint in about a dozen places, put on decals, and glosscote the whole thing. But it's coming along.

Building the Thunderhawk

Rockets have been on my mind because last week I got an announcement about a rocket launch coming up this Saturday at a park here in Berkeley.

Naturally, being the awesome but busy guy that I am, I had a few unbuilt kits in the closet collecting dust. So I pulled them out and started thinking about interesting ways to combine them. I am building a big-ass starfighter, and I'm calling it the Thunderhawk. Estes had a kit back in the day called the Thunderhawk, but I don't care. It was not worthy of the name. If you want to give something a name that is so sweet that makes you a little sick just to think about it, I think Thunderhawk is about as good as it gets. My rocket is definitely going to be worthy.

I haven't built a rocket in maybe 15 years. This is the most complicated model I've ever attempted, not least because I'm making it up as I go along, and most of the parts are made from scratch. The body tubes came from three Estes kits: a Screamin' Mimi, a Baby Bertha, and the Sith Infiltrator that I picked up on clearance for five bucks before we moved from Oklahoma. I cut down the nose cones from the Mimi and the Bertha to make the connectors. The fuselage braces, guns, and fins are almost all made from scratch using dowel rods and basswood stock, although I did chop some of the Mimi's fins into new shapes.

My three best friends in this enterprise have been my Dremel, good for cutting and power-sanding small parts; my Legos, good for building custom fin alignment rigs; and some cardstock, also good for building fin supports.

Here you can see the completed fuselage (the engine mount is sticking out at the bottom) sitting in the alignment rig for the main wings.

And here are the wings in place while the glue dries. The main wings are made from 3/16" basswood stock from the local hobby store and laminated for strength.

At the end of the main wings there will be vertical fins with smaller fins canted in at the top and bottom, sorta like a TIE Interceptor or a Gunstar. This is another Lego rig I built to hold those fins in place while they set up.

Lots going on here. The fuselage is laying on its side in the new Lego drydock. You can see that I've added additional pods on the top and bottom and small canard wings in front of the fuselage transition. The completed wing/gun combos are laying in front, waiting to be glued on.


Here's a closeup of the back end with one of the wing/gun combos in place. The white pillars are cardstock supports.

I still have a lot to do. I have to finish the other wing, cut down a breath mint container to make a cockpit canopy (no kidding), cut up some small dowels to make pipes for detailing, seal the fins, spray paint the thing, detail paint it, and put on decals, which I'll have to kitbash from something else.

Still, I'm having a hell of a lot of fun, and it should be a kickass rocket when I'm through. Stay tuned.

Rockets

When I was a kid, I was in 4-H. 4-H was definitely not as cool as Boy Scouts, but there were no Boy Scout troops around and there was a 4-H club. When you hear 4-H, you probably think of farm kids showing their prize pigs at the county fair. I did show a lot of stuff at the county fair, but mostly drawings, photos, and models (I did show some chickens once). 4-H had programs for all of these things and more. But mainly I was in 4-H for one thing: rockets.

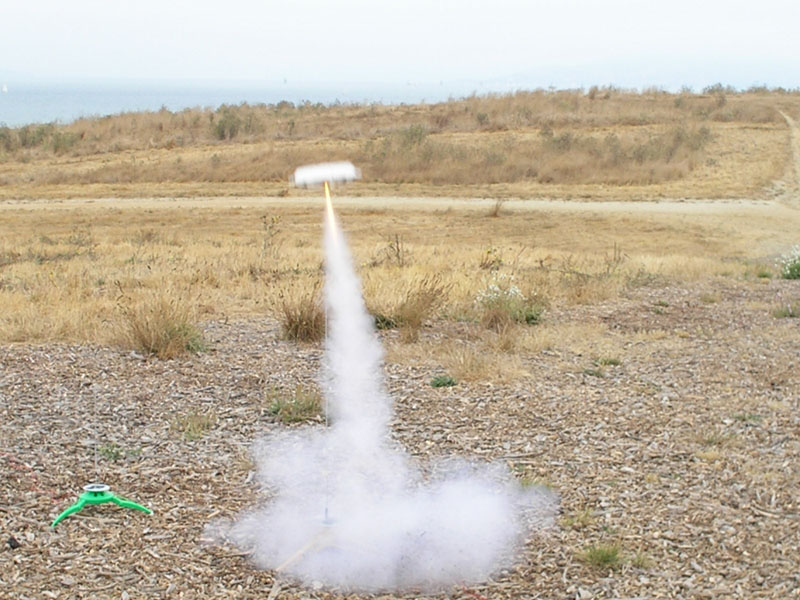
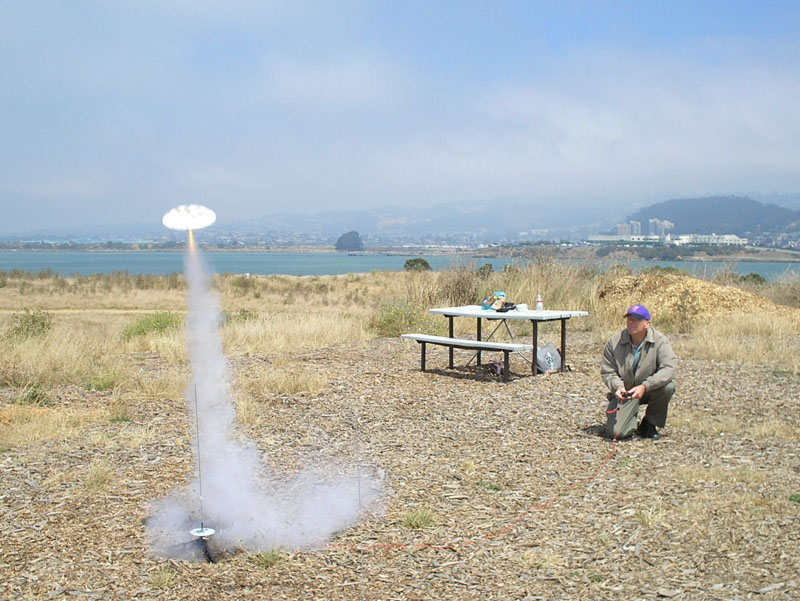
I discovered model rockets through 4-H. The appeal is pretty straightforward. You build a rocket and then you fly it. The kits are cardboard and balsa, you get commercially-produced solid fuel motors at hobby stores, and the ignition system is electrical. It's all very safe and sanitary, assuming you follow the safety code, which is full of no-brainers like "don't try to build your own rocket motors" and "make sure everyone is standing at least 10 feet back from the launch pad before you push the ignition button." And this fragile thing that you built yourself roars off the pad and flies up to 1000 feet. It is very, very cool.

I used to build and launch rockets with my brothers and my cousins, and of course we started violating the code left and right. Just the little ones, things like "make sure your rocket has a recovery system" (most come down on parachutes or streamers, or glide down) and "do not launch your rocket at a target." There's really one one rule in the safety code that is best not broken, and that's the one about making your own motors. There aren't many horror stories associated with rocketry (unless you count rockets eaten by trees, or parachutes that failed to open), and those that exist mainly describe how Billy Bob Butthead blew off his thumbs or blinded himself experimenting with homemake rocket fuel.

I have a zillion rocket anecdotes, and maybe someday I'll share some. But the purpose of this post is to provide myself with an annotated list of cool rocketry sites. If you find it useful or entertaining, that's gravy.

The best site I've found for cheap rockets and supplies is HobbyLinc.com. They cover all the major manufacturers, and they usually have some screaming deals.

The granddaddy of the commercial rocket manufacturers: 
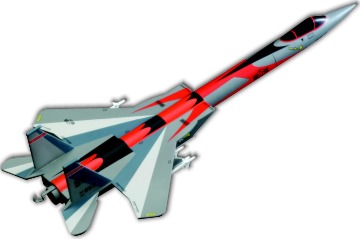
Estes. No one else makes so many rockets, but...it seems like the older Estes kits had a lot more character. Too many of the ones they offer these days are simple 3FNCs (that's "three fins and a nose cone"). One exception is the new F-15-like Screaming Eagle. Fortunately, if you have a yen for old Estes kits, you can get them vintage at suppliers like Modelrockets.co.uk, or get clone kits from Thrustline Aerospace, or build them from scratch using the damn-near-exhaustive blueprints at JimZ Rocket Plans.

Most of those companies offer kits, clones, or blueprints from other rocket manufacturers. Notable ones include:

Quest Aerospace makes some very cool kits reminiscent of old Estes offerings, including the thoroughly badass Space Shuttle Intrepid, a glider that is carried up by a mothership.

Custom Rockets also makes kits with a lot of character, like the old Estes stuff.

Semroc has a lot of cool kits. Their Retro-Repro line consists of clones of old Estes and Centauri kits, including two of the sweetest model rockets ever sold, the Estes Mars Lander and the Centauri SST Shuttle-1, another shuttle/mothership combo.

QModeling has staked out a nice little niche: they only make upscale clones of old Estes kits, including the Starship Vega and Mars Snooper.

Squirrel Works
has some rockets with a lot of pad presence, not least their Flash Gordonesque Ajax and especially the Fokker-inspired Mega Baron glider.

FlisKits specializes in wacked-out stuff like a giant rocket made out of coffee cups, and some badass sci-fi models.

Edmonds Aerospace specializes in gliders, from teeny ones with 6-inch wingspans up to monsters 3 or 4 feet long.

Art Applewhite Rockets makes the guys at FlisKits look downright sane, with rockets made from disposable plastic plates and Bic pens and even more unlikely shapes.

Just for completeness, LOC Precision makes high-power rockets...that are mostly 4FNCs (yawn).

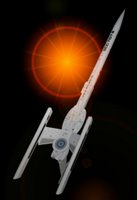
Not quite finally, I have a serious jones for the Refit U.S.S. Atlantis from Sirius Rocketry. The old Estes U.S.S. Atlantis was styled after the starship Enterprise from old Star Trek. The Sirius "refit" is a near-clone updated to match the stylings of the movie Enterprise.

Finally (for now), the guy at Excelsior Rocketry sells decals and plans. My favorite among his products are the Goony sets, which use an Estes Baby Bertha to kitbash stubby versions of classic Estes kits. Hmm...I wonder if you could make a Goony Strike Fighter...

UPDATES: Put your local hobby store out of business by picking up cheap kits from Belleville Hobby and their even cheaper outlet, Estes Rockets Wholesale.

Get your DIY on with Jimmy Yawn's awesome pages on rolling your own rockets.

Video rocketry. Self-explanatory. Wicked cool.

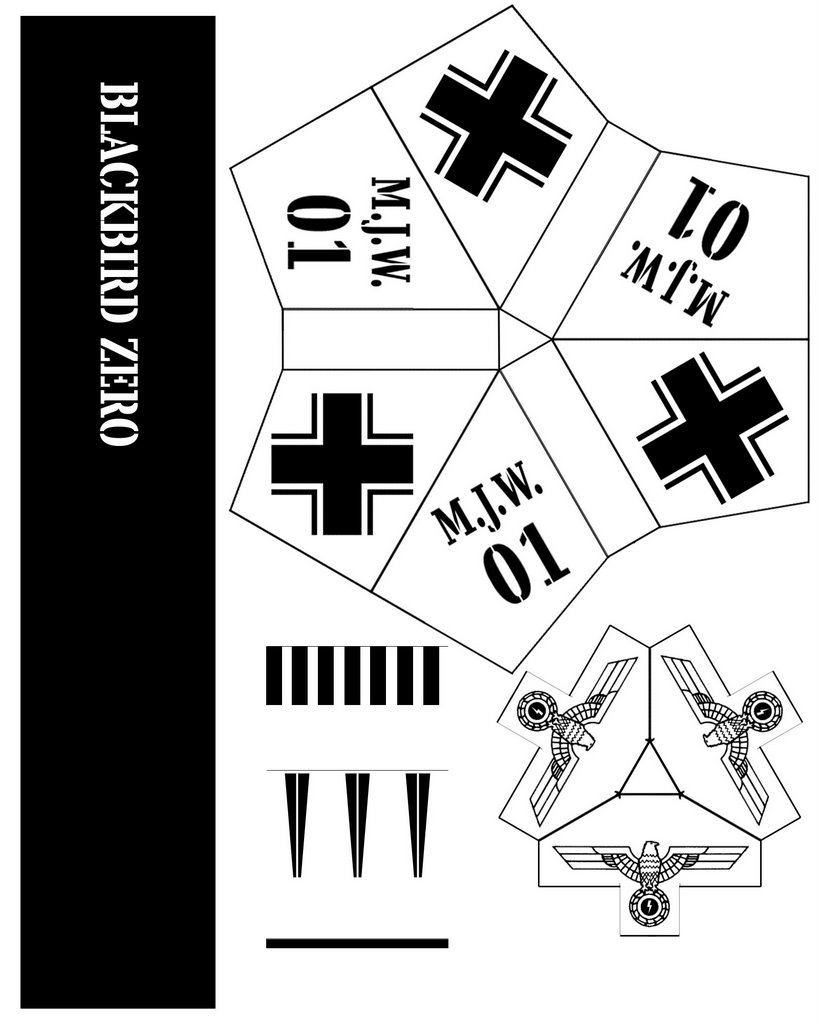
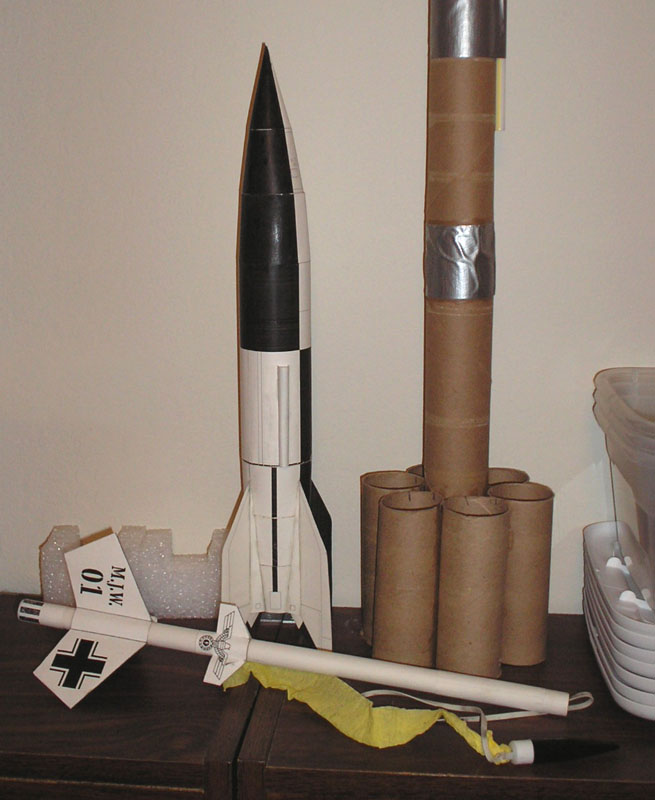
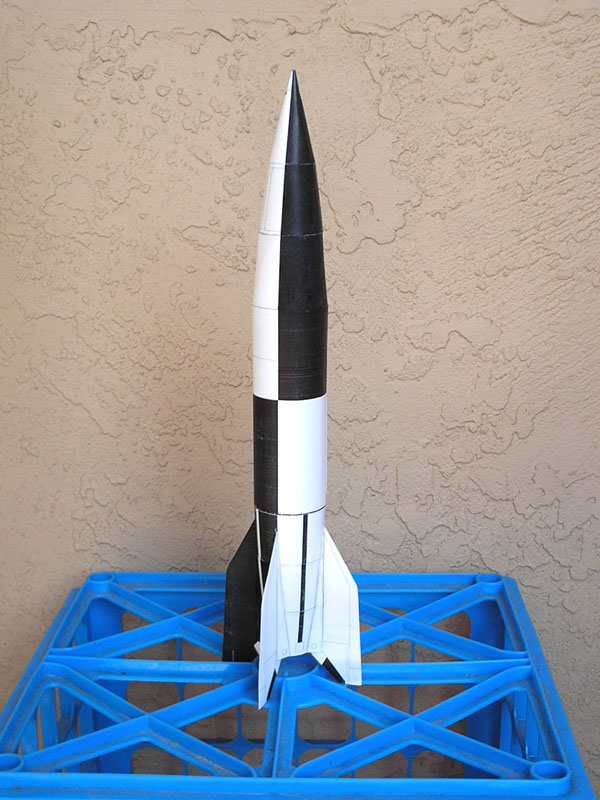
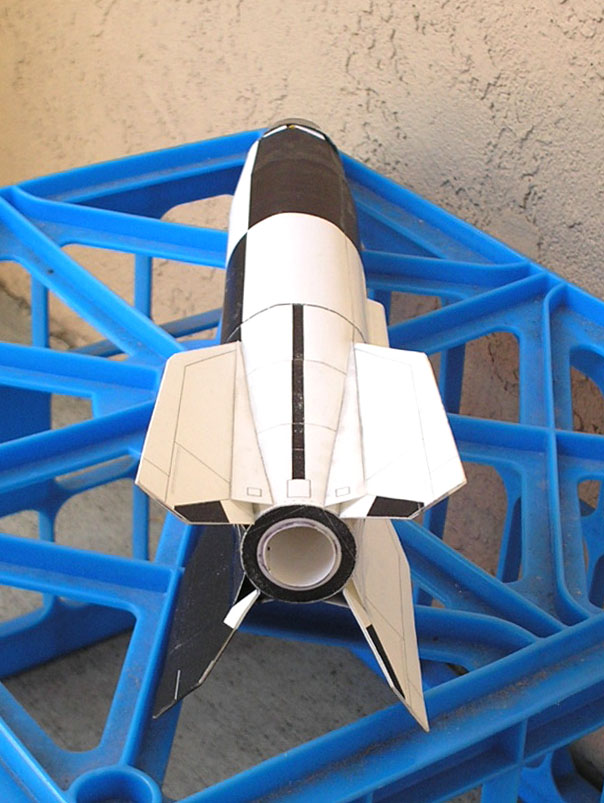
Finally (again, for now), Ralph Currell's card models are not designed to fly, but they're not designed not to fly, and some of them do.

MORE UPDATES: Essence Model Rocket Reviews has a simply unbelievable amount of information on the construction and performance of damn near everything.

Attack of the clones: resources for cloning classic kits.

Apogee Components has all kinds of cool stuff, including an article on making rocket components out of paper.

The Rocketry Blog is another good site with lots of resources, including 
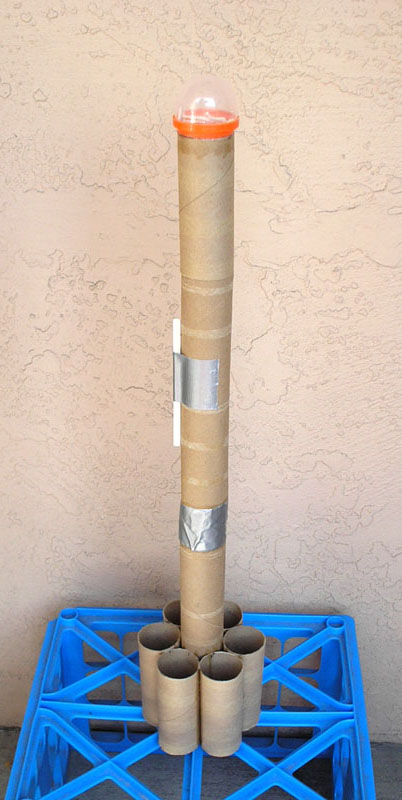
garbage rockets (i.e., scratchbuilt from household items) and probably the largest list of paper rockets anywhere.